Design Experiment
Designing an Experiment consists of 4 fundamental steps:
- Defining Experiment Title, Subject Code
- Creating Session(s) for Experiment
- Creating Protocol(s) for each Session
All the aspects of Designing an Experiment are mainly dealt in the following view of the application except the Protocol’s related parameters.
Adding Experiment & Subject
Once the BEST Toolbox application has been launched the next steps are to add the Experiment Title and Subject Code in the text fields available on the GUI. The title you will enter here will be used as a reference to store the data in your current directory for this particular experiment. The stored data can also be populated again in a fresh BEST Toolbox app window by just click the “Upload” button available in the menu and navigating it to that particular file.
Note that the Experiment Title and Subject Codes are both strings that your Operating System (OS) would allow as a name of folder or file, otherwise you are prompted to change the names by BEST Toolbox.
Adding Sessions
In order to add the session, just type the name of the session which could be any meaningful string and click on the + button on the right to the “Session Title” field so that it will get entered in a list named as “Sessions” in the application.
-Using the same procedure you can add as many sessions as required.
-Right click on the sessions’s list box would allow you to:
- Delete
- Copy
- Paste
- Moveup
- Movedown
any particular session.
-BEST Toolbox has integrated session management in its workflow. This reason behind this module of session management is to keep the data per Experiment as much consolidated and disciplined as possible. For an instance, if an experiment requires the same subject to undergo through three different sessions (either on different days or different kind of interventions), then with this session management tool of BEST Toolbox, you can just design the session only once and copy, paste that to repeat the exactly same steps.
Adding Protocols
In order to add the Protocols under a session (which are basically all the basic functions such as MEP measurement etc), just click on the drop-down menu next to the “Select Protocol” text and then select any Protocol you want to perform. Currently the available measures are:
| MEP Hotspot Search |
| MEP Threshold Hunting |
| MEP Dose Response Curve |
| MEP Measurement |
| rsEEG Measurement |
| Psychometric Threshold Hunting |
| TEP Hotspot Search |
| TEP Measurement |
| rTMS Intervention |
| TMS fMRI Measurement |
Then click on the + button, in order to add Protocol and further modify its Parameters and run it.
-Using the same procedure you can add as many Protocols as required.
-Right click on the Protocol’s list would allow you to:
- Delete
- Copy
- Paste
- Moveup
- Movedown
- Load Results (if previous results are available)
any particular Protocol.
Status of each Protocol is also provided in the list next to the list of Protocols. Following statuses are possible:
- Created
- Compiled
- Successful | Starting Data Time Stamp | Ending Date Time Stamp
- Stopped | Starting Data Time Stamp | Ending Date Time Stamp
- Error | Starting Data Time Stamp | Ending Date Time Stamp
Summary
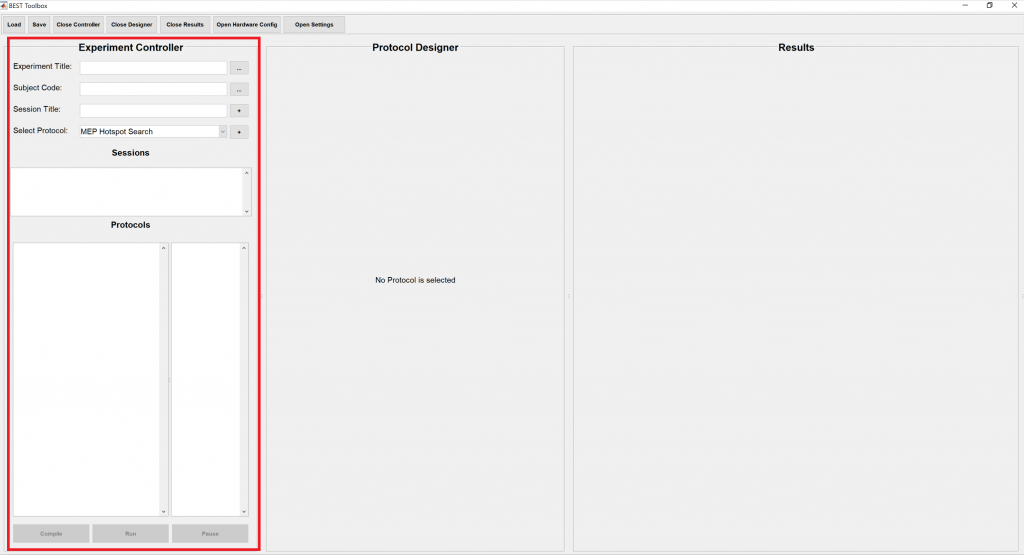
Once the Experiment, Subject Code, Sessions and Protocols are populated the application would get an appearance similar to Figure below. The selected Session and Protocol are highlighted and their stimulation or experimental parameters to be filled in by user are shown on the also to the right termed as “Protocol Designer”. Dedicated documentation pages are available for instructions to fill out the stimulation or experimental parameters in this wiki.
